Description
In this coding challenge, the user is given images of employees and needs to find those with access to the secret room.
File Provided: model.h5
Solution
When accessing the web page with the challenge, you are provided with additional information (Clicking “Download the Model” provides the file I have added to the challenge description - model.h5):
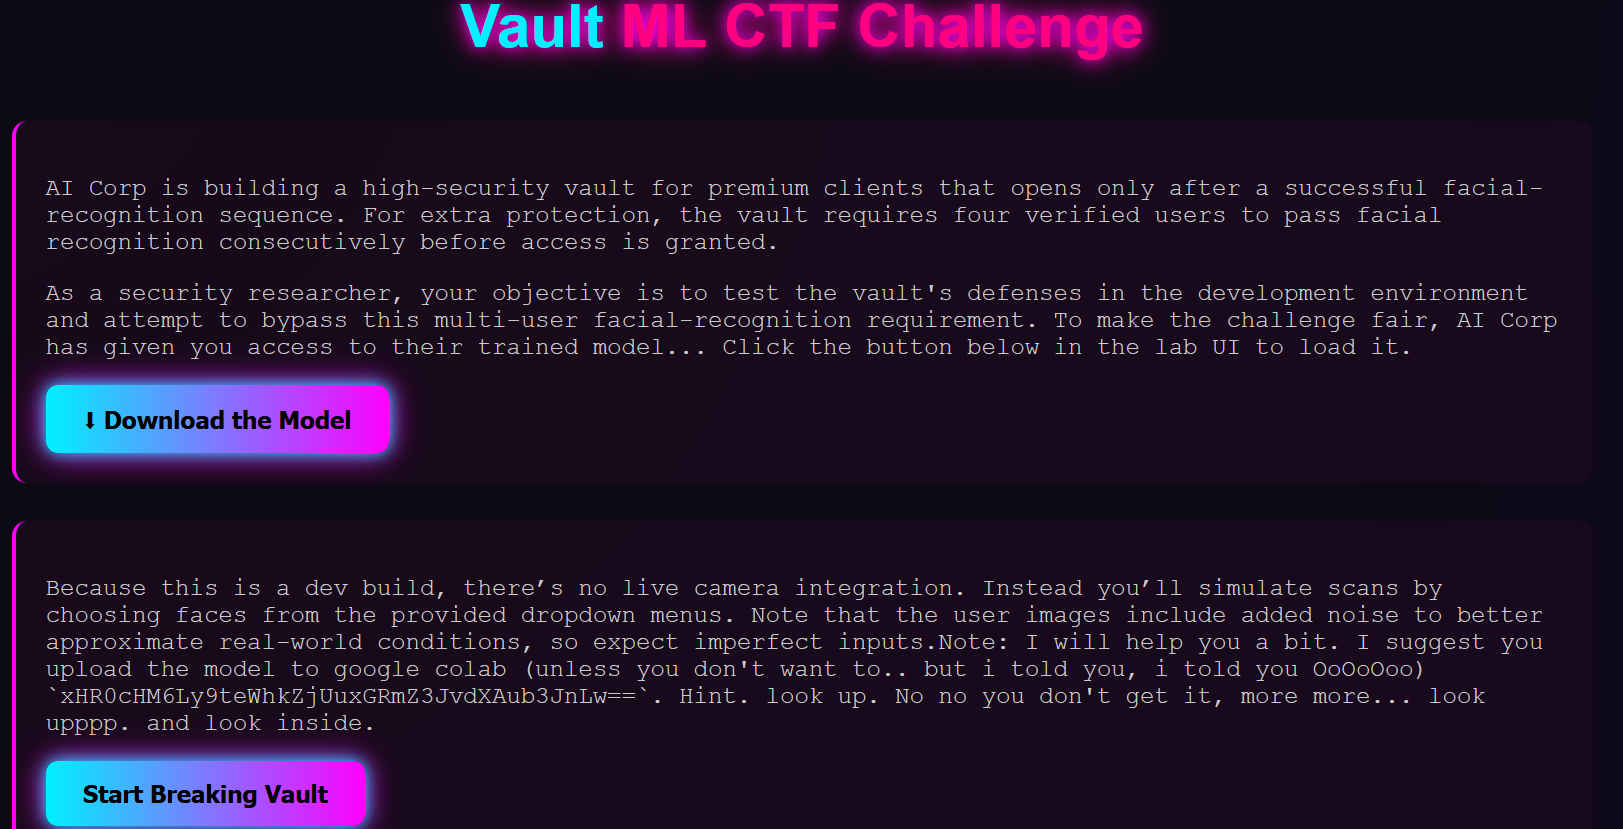
The base64 string provided decodes to:
https://myhdf5.Ädfgroup.org/
which is basically: https://myhdf5.hdfgroup.org/
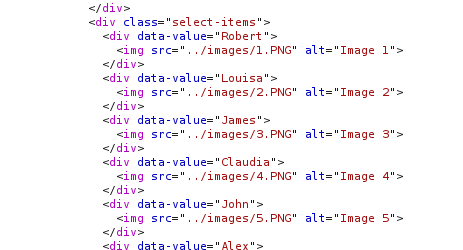
If we click on “Start Breaking Vault” we go to a page where we have 4 dropdowns and in each we can select the image of a face:
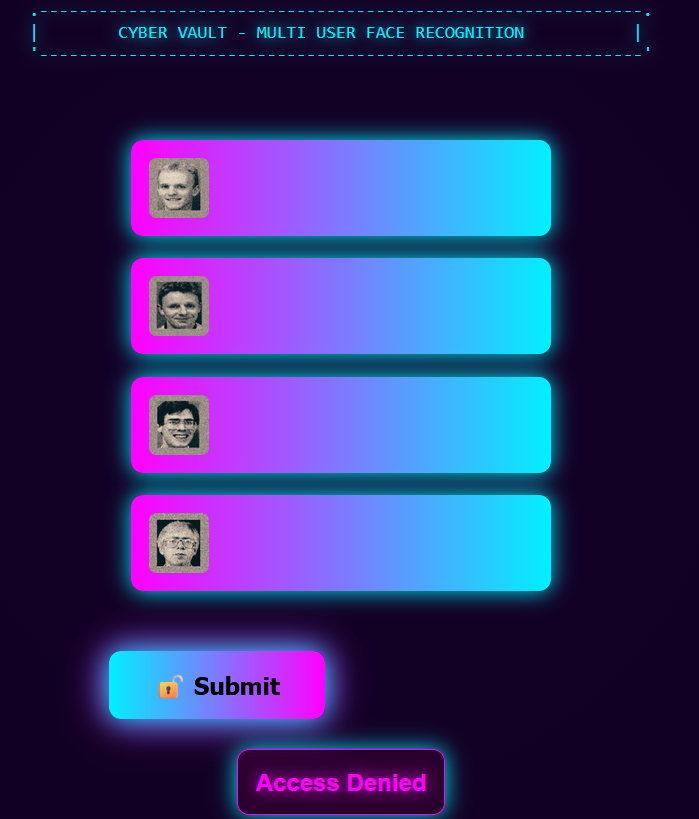
From this, it looks like the target is to find the 4 faces that will give us access. Brute forcing the faces won’t work, because there’s a rate limit. The best approach is to perform a model inversion (MI) to disclose information about the training data. This challenge is the same as this one:
https://github.com/alexdevassy/Machine_Learning_CTF_Challenges/tree/master/Vault_ML_CTF_Challenge
To solve the challenge, let’s start by loading the model into Google colab:
https://colab.research.google.com
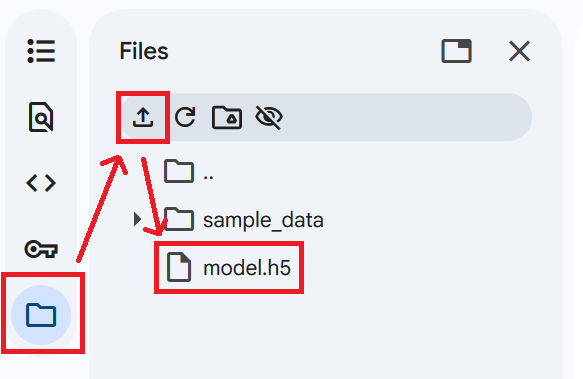
Create a “New notebook” and upload the model:
Now we can run code against the model to explore it. As per the link provided with a similar challenge, we can use the following code to get a summary of the model information:
import numpy as np
import matplotlib.pyplot as plt
import os
import cv2
import random
from keras.models import load_model

model = load_model("/content/model.h5")
model.summary()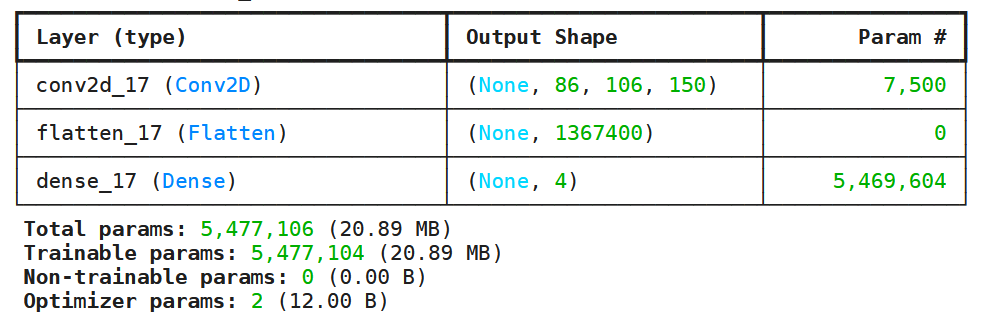
As an alternative, you can use HDFView to navigate the model: https://support.hdfgroup.org/downloads/index.html
What we can extract from the above image is that the Convolutional Neural Network (CNN) uses 3 layers: Conv2D, Flatten, and Dense. If we open the model with HDFView, we can also see other useful information about the model, in particular, the size of the images used (input shape is 92x112):
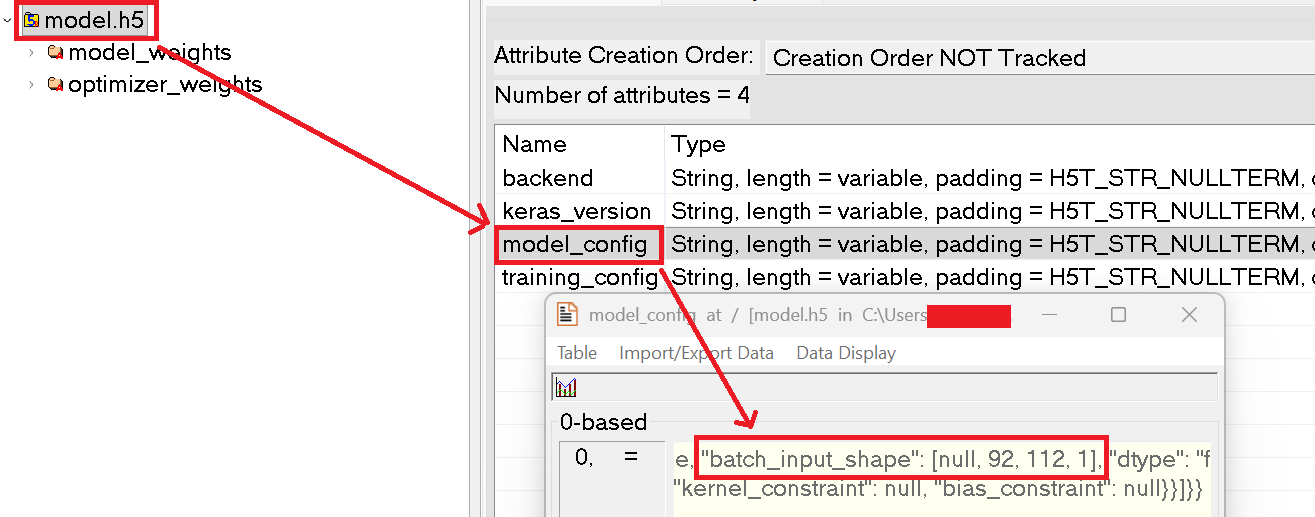
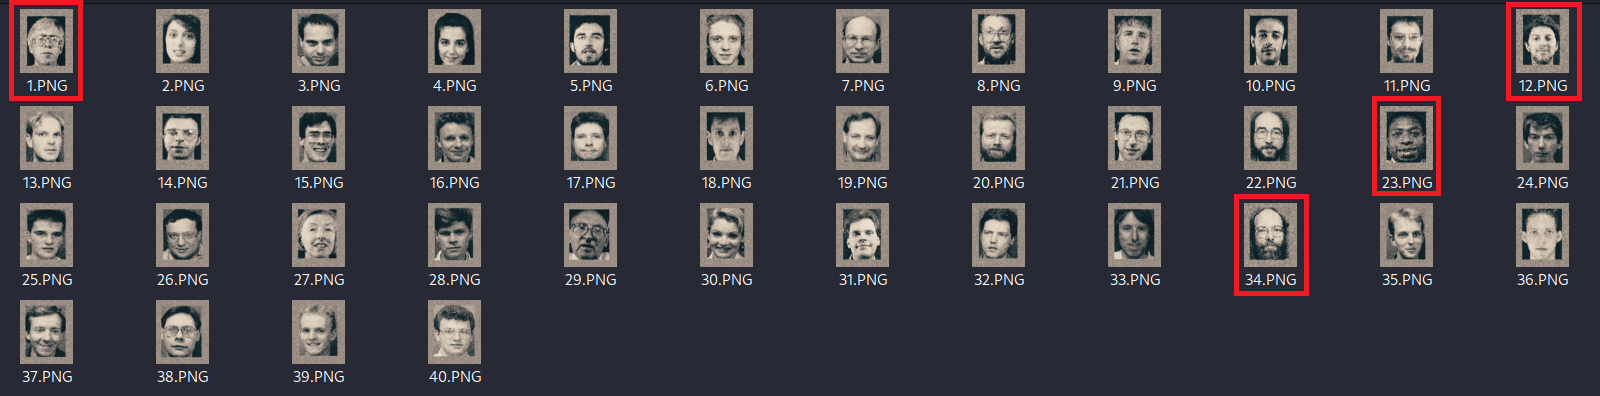
So now, considering that the model has been trained to identify the 4 users to access the vault, what we need to do is to collect all the images we have from the site and run them against the model to see which are the ones allowed to access the vault. When you access the site, all images are downloaded as can be seen below (from 1 to 40):
We can download all images for example using wget:
wget -nd -r -P images/ <challenge-url>/images/{1..40}.PNG
Now that we have all images, we can add them to the google colab project. Now, we can use the following code to obtain the 4 images of the authorized users (note that I had to make a slight change in the code compared to what’s given in the solution I referenced before):
import tensorflow as tf
from keras.models import load_model
import numpy as np
import matplotlib.pyplot as plt

model = load_model("/content/model.h5")
IMG_Y_SIZE = 112
IMG_X_SIZE = 92

# Define the loss object for sparse categorical crossentropy
loss_object = tf.keras.losses.SparseCategoricalCrossentropy(from_logits=True)

def inversion(model, img, learning_rate, label, counter):
  # Use gradient tape to watch the image tensor
  with tf.GradientTape() as tape:
      tape.watch(img)
      prediction = model(img, training=False) # run img through the model
      # Reshape label to have shape (1,) to match the batch size of prediction
      loss = loss_object(tf.reshape(label, (1,)), prediction) # calculate the loss of img
  # Calculate gradient of loss with respect to image
  gradient = tape.gradient(loss, img) # calculate the gradient with respect two each pixel in img
  # Update image by subtracting gradient * learning rate, and clip values
  img = tf.clip_by_value(img - learning_rate*gradient, 0, 255)
  img = np.array([np.clip(x+np.random.normal(2,2), 0, 255) for x in img.numpy()])
  # Convert back to tensor
  img1 = tf.convert_to_tensor(img)
  predicted_class = np.argmax(prediction, axis=1)
  return img1,img

# Create a black image tensor as starting point
black_image_tensor = tf.convert_to_tensor(np.zeros((1,IMG_X_SIZE,IMG_Y_SIZE,1)))

classes = 4
# Set up matplotlib figure for visualization
fig, axes = plt.subplots(1, classes, figsize=(20, 5))  # Create a grid with 1 row and 'classes' columns

for name_index in range(classes):
  best_img = black_image_tensor
  best_loss = float('inf')
  for i in range(100):
      best_img,img = inversion(model, best_img, 0.1, name_index, i)
  # Display the resulting image in the corresponding subplot
  axes[name_index].imshow(tf.reshape(img[0], (IMG_Y_SIZE, IMG_X_SIZE)), cmap='gray')
  axes[name_index].set_title(f'Label {name_index + 1}')
  axes[name_index].axis('off')  # Hide the axe
plt.imshow(tf.reshape(img[0], (IMG_Y_SIZE, IMG_X_SIZE)), cmap='gray')
plt.show() # display the image in the output
The result of running the above against the model and the images is as follow:
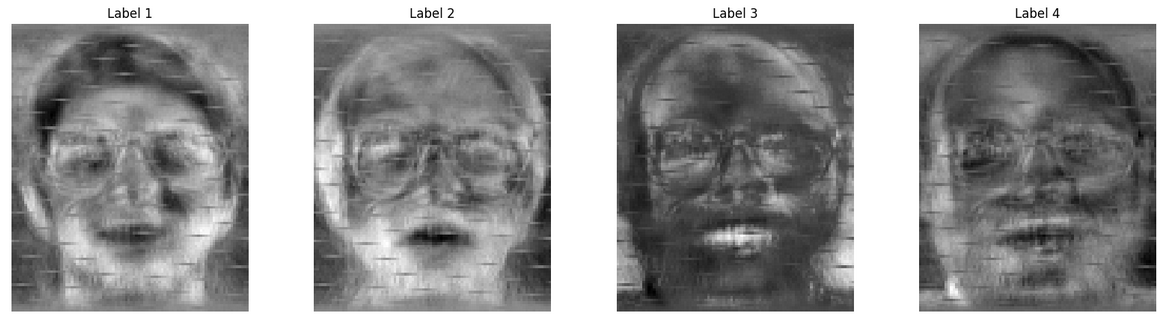
Because there was some noise added, the images are not exactly the ones we have. The final step is to locate the 4 images that correspond to those 4 (images 12, 1, 34, and 23):
Selecting the images and submitting them will return the flag.
POST /submit HTTP/1.1

{"dropdown1":"Jeff","dropdown2":"Robert","dropdown3":"Frank","dropdown4":"Joshua"}